Grouping multiple objects allows them to become a single entity, while resizing them and changing their format. In this guide, you will learn how to group and ungroup multiple elements in PowerPoint.
Understanding Grouping in PowerPoint
• What Does Grouping Elements Mean?
◦ Combine shapes, images, text boxes, or objects into a single unit for easy manipulation.
• Why Group Elements?
◦ Simplify movement, resizing, or formatting of multiple objects.
◦ Maintain layout consistency (e.g., aligning charts, diagrams, or infographics).
How to Group Elements in PowerPoint
Step 1: Open PowerPoint.
Step 2: Select the elements you want to group. You can hold down the CTRL key while clicking on the elements with your mouse.
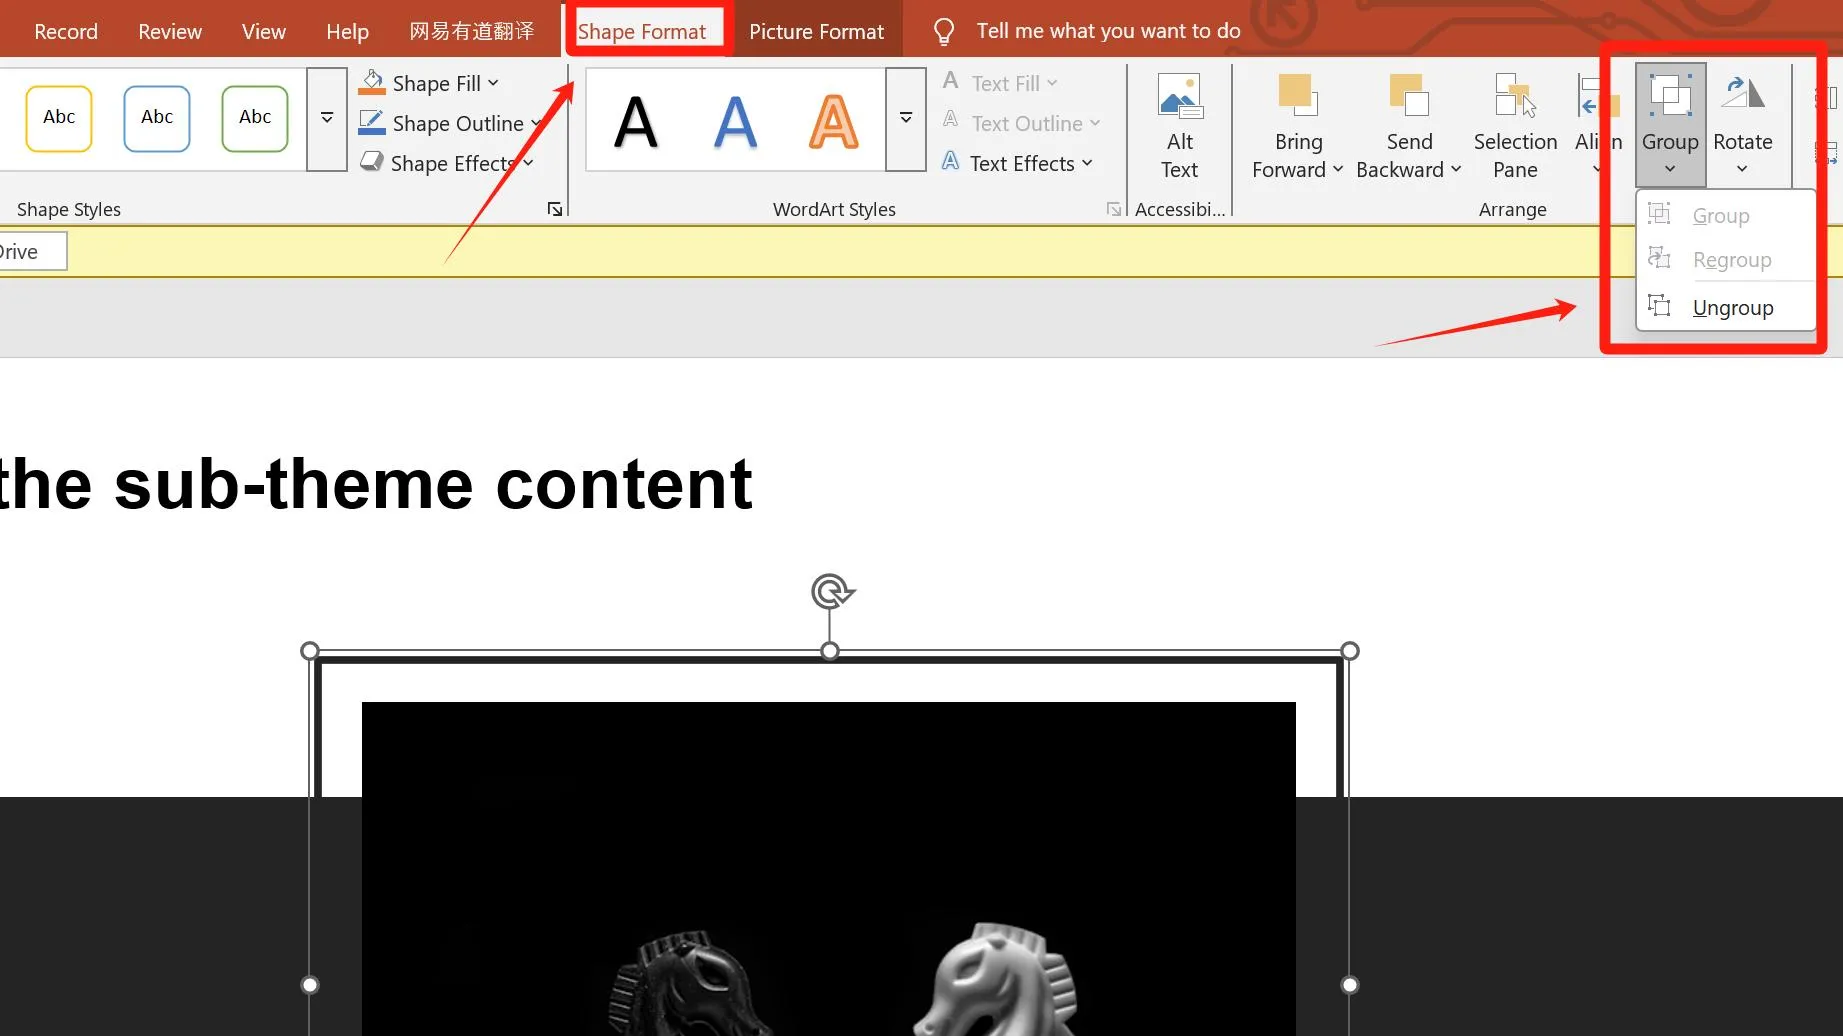
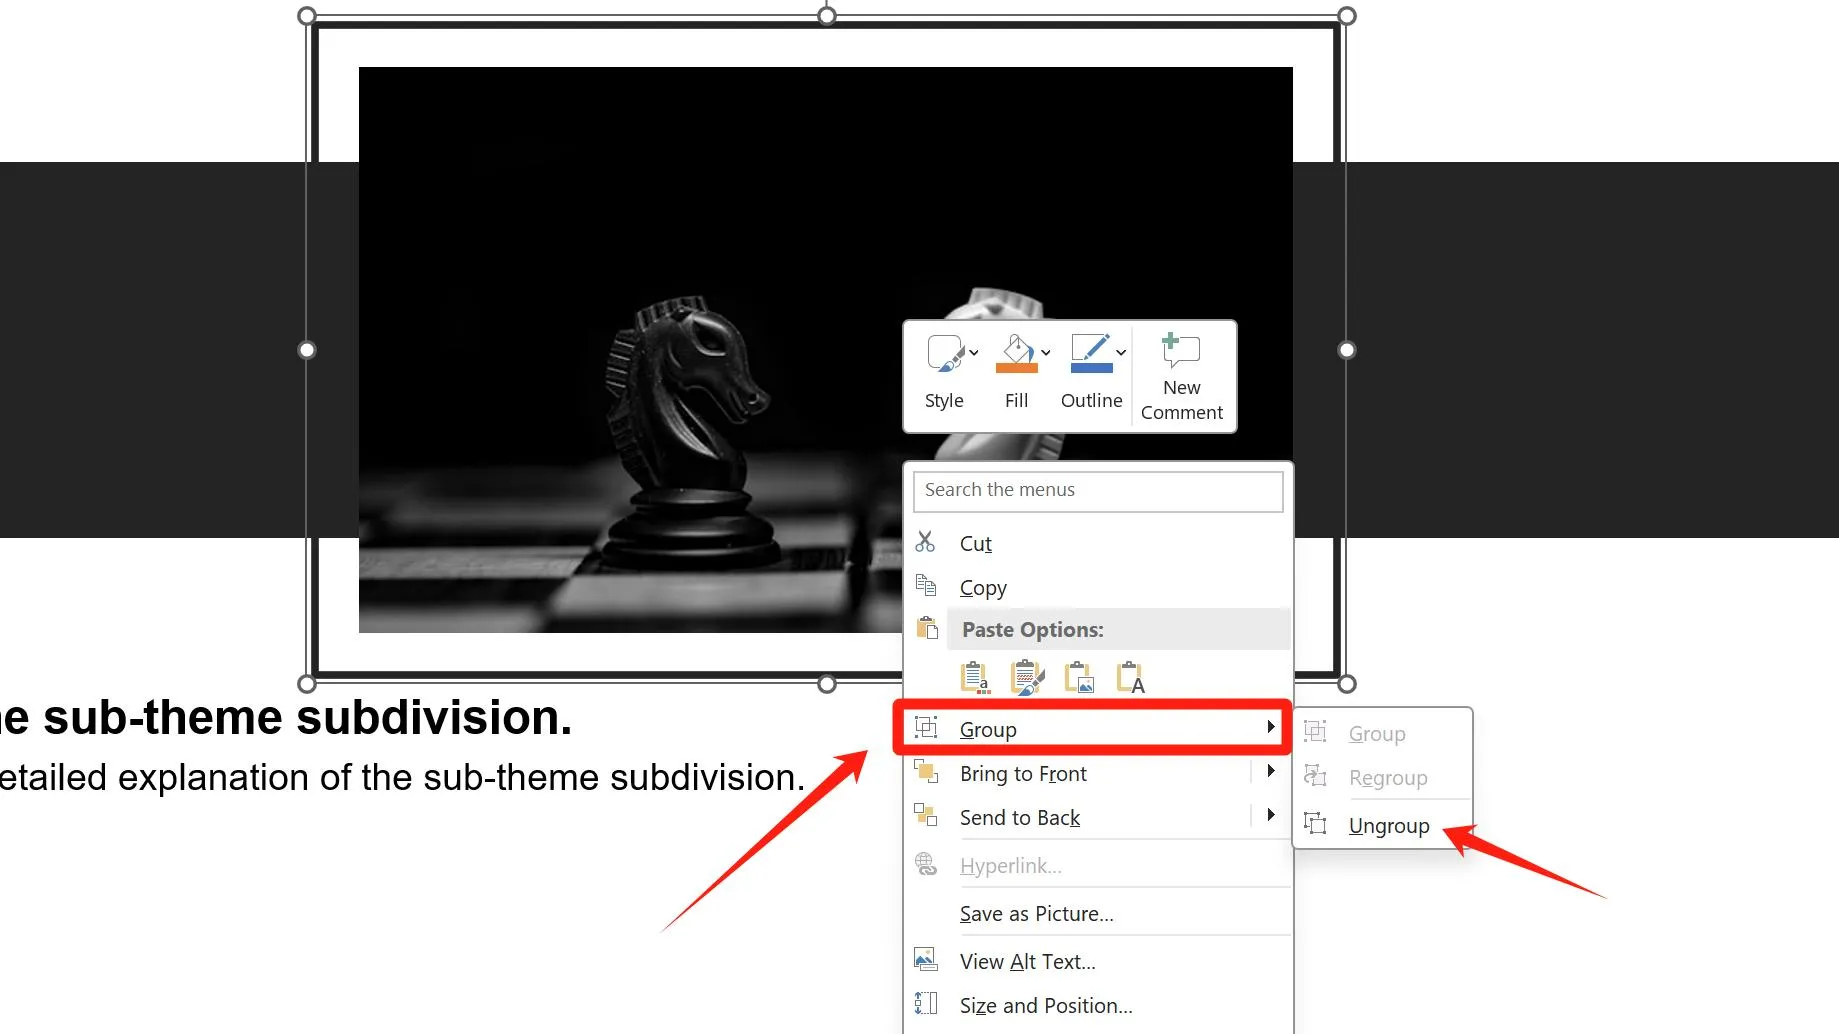
Step 3: In the Shape Format tab at the top, find the Group option on the right and click to apply it. Alternatively, you can right-click directly and select Group > Group.
Step 4: Now, you can resize and format these objects as a single entity.
How to Ungroup Elements in PowerPoint
To ungroup, select the grouped elements, go to Shape Format > Group > Ungroup, which will break apart all combined elements.
Similarly, you can also right-click and choose Group > Ungroup.
How Grouping Enhances Efficiency in Presentation Creation
1. Simplified Format Conversion
When presenting on other devices without prior testing, font compatibility issues may arise. To avoid this, convert text to images. Instead of converting each element individually, group them first and convert them all at once for faster processing.
2. Batch Operations Become More Efficient
When multiple elements (e.g., shapes, images, text boxes, charts) on a page need to maintain their relative positions, grouping them allows unified dragging, rotating, and other adjustments. This avoids time waste and misalignment caused by individual edits.
3. Complex Layouts Achieve Higher Precision
When designing multi-element layouts (e.g., data charts + annotation arrows + explanatory text, hierarchical diagrams), grouping prevents accidental misalignment or layout disruption due to unintended operations.
4. Synchronized Animation Effects
Applying animations to a grouped object ensures all sub-elements play effects simultaneously (e.g., fading in together, moving as one unit).
5. Prevent Accidental Edits During Collaboration
In multi-user editing, confirmed design modules can be grouped and locked to avoid accidental deletion or modification of internal elements.
After selecting a grouped object, use Drawing Tools → Arrange → Lock to prohibit moving, resizing, or modifying any elements within the group, ensuring core content remains secure.
Common Use Cases for Grouping in PowerPoint
Streamlining Complex Infographic Design and Adjustments
When designing multi-element infographics, grouping elements can significantly streamline the process.
For example, to dynamically display a timeline in stages (e.g., revealing phases sequentially), pre-group elements for each stage and control their appearance order via animations.
This ensures visual consistency while minimizing repetitive adjustments.
Maintaining Visual Consistency in Brand Templates
Standardized elements in corporate templates (e.g., logos, headers/footers, color modules) often need reuse across slides.
By grouping these elements into fixed units, their position, scale, and formatting remain identical on all slides, preserving brand integrity.
Accelerating Batch Formatting Edits
Grouping enables one-click batch formatting for large sets of elements (e.g., shadows, borders, transparency).
For instance, applying rounded corners to multiple images requires just a single adjustment after grouping, ensuring uniform styling across all elements.
F&A
Q: Can I select multiple objects at once?
A: Of course yes. Place your mouse in a blank area inside or outside the slide, hold down the right mouse button and drag to create a gray selection box. Cover the elements you want to select with this box, and you can select multiple objects at once.
Q: Why aren’t elements selected when using the above method?
A: Ensure the gray selection box fully covers the text box boundaries of the target elements, not just the visible parts. Some elements (even small ones) may have larger text boxes, and only covering those boundaries will select them.
Q: How do I ungroup all grouped elements at once?
A: If a slide has multiple groups, press Ctrl&A to select all elements, then group them together, and finally ungroup. This removes all groupings in one step.
Q: Can I edit individual elements within a group?
A; Yes. First click selects the entire group. Click again on the specific element you want to edit (or double-click it directly) to modify it independently while keeping the group intact.
Q: Can grouped elements have their layering adjusted (e.g., Bring to Front/Send to Back)?
A: Right-click the group and select “Bring to Front” or “Send to Back”. The relative layering within the group remains unchanged.
Q: How do I convert text to images as mentioned in the last part?
A: First, select the text box you want to edit. Then, cut or copy it. After that, right-click and choose paste as Picture from the Paste Options to replace the text with an image. Finally, adjust the position of the converted image as needed.
Using Smallppt to Create Presentations Quickly
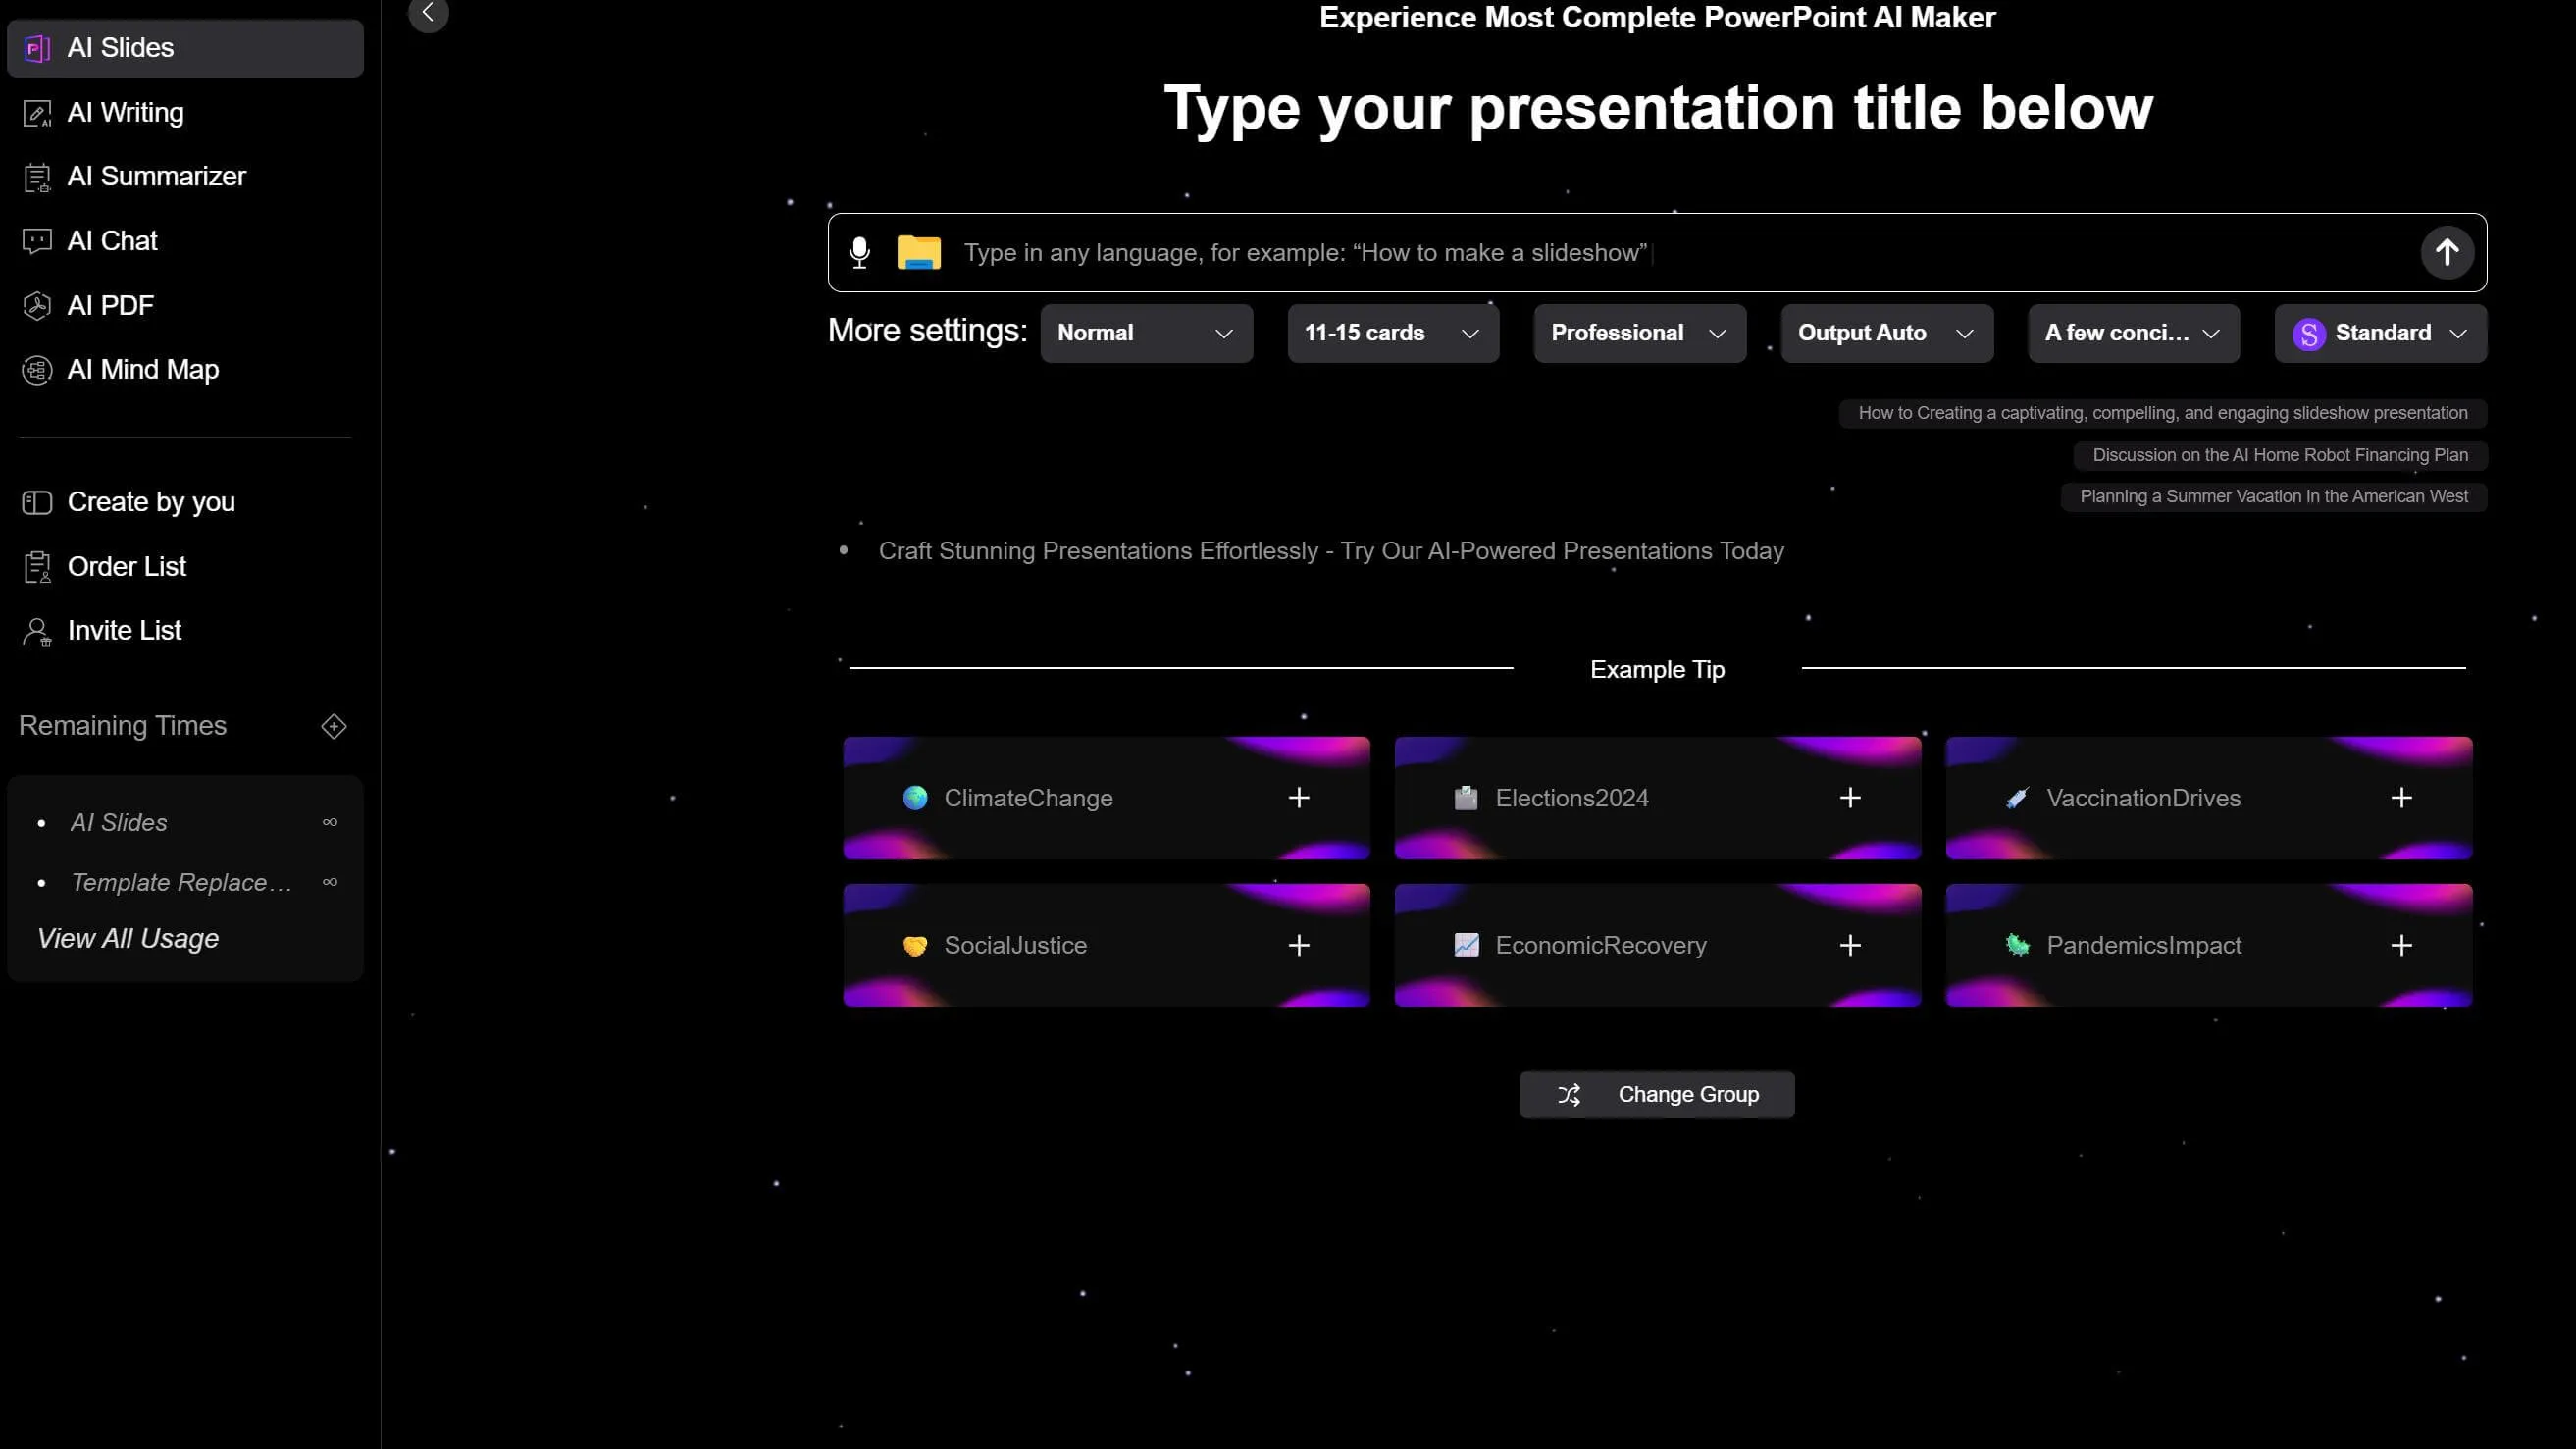
Smallppt streamlines presentation creation through an end-to-end intelligent process, enhancing both efficiency and quality. It generates logically structured content outlines and copy based on keywords, automatically curates professional data and case studies, and supports voice commands and batch edits to minimize manual work. It even tailors presentation logic for different audiences, helping users craft professional and visually appealing presentations effortlessly.
Simply input keywords or upload related documents, audio files, or URLs. Smallppt will automatically generate or summarize a text outline. Once finalized, select your preferred template, and Smallppt instantly populates the outline into a polished presentation.
How to group elements in Smallppt?
Similar to PowerPoint, select the elements you want to group, right-click, and choose Group to combine them. To ungroup, right-click the grouped object and select Ungroup.
Next time you create a presentation in PowerPoint, try using the Group and Ungroup features to boost your productivity.