


Ever wondered why some slides just look so organized? Learning how to do hanging indent on Google Slides is a simple way to make your text cleaner and easier to read.
Whether it's for school projects, business proposals, or teaching materials, using a Google Slides hanging indent can instantly boost your slides' clarity and professionalism. AI Tools like Smallppt can take it even further with templates and design resources to make your presentation truly engaging.
What Is a Hanging Indent?
A Google Slides hanging indent is a paragraph formatting style where every line except the first one is indented. This type of layout is commonly used in situations like:
- Lists, references, and bibliographies
- Slide content to make it easier to read
Using hanging indents in your slides not only makes your text look neater but also gives your presentation a more professional, organized feel—something your audience will definitely notice.
Why Use Hanging Indents in Google Slides?
Google Slides hanging indents are a simple way to make your slides look cleaner and more organized. They don't just improve readability—they also give your presentation a professional touch. Here are some of the main benefits of using hanging indents:
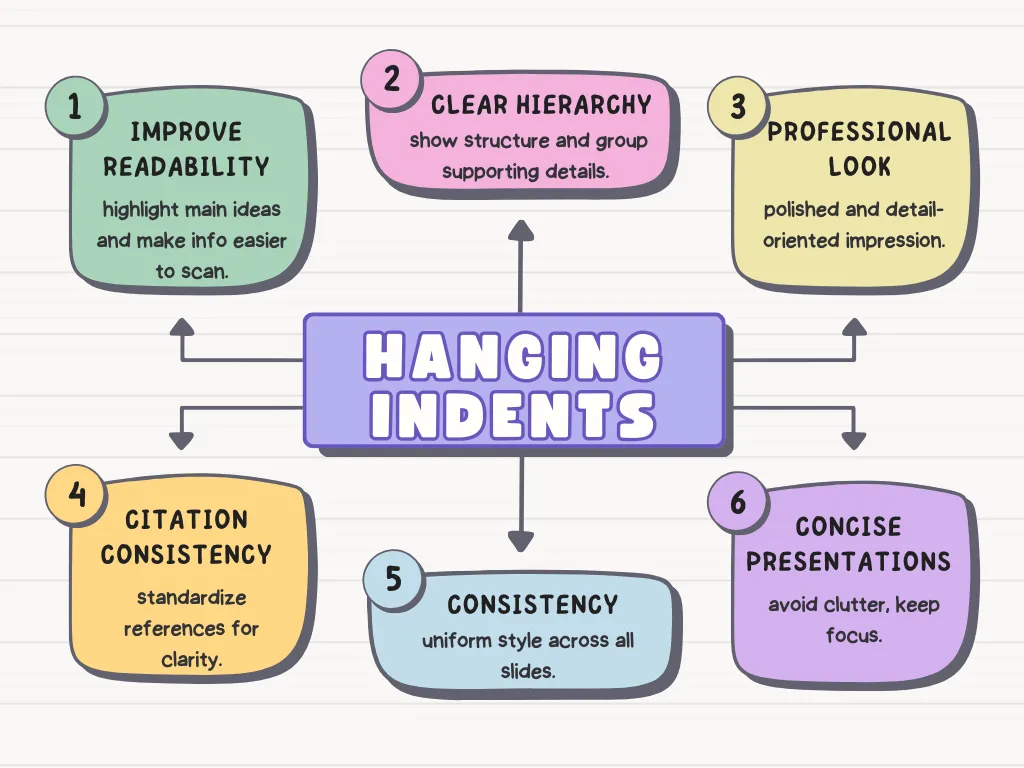
- Improve readability:Indenting the lines after the first in a paragraph or list helps highlight the main point, making it easier for your audience to quickly grasp new information.
- Clear hierarchy: Hanging indents create a visual structure, emphasizing main points and grouping supporting details so your audience can follow along effortlessly.
- Professional appearance: They show that you've paid attention to detail and organized your content thoughtfully, leaving a polished, professional impression.
- Citation consistency: For academic or professional presentations, hanging indents help standardize references, making sources clear and easy to distinguish.
- Consistency:Using hanging indents throughout your slides establishes a uniform style, making your overall design neat and cohesive.
- Concise presentations: They help separate each point in lists or slides with limited space, avoiding clutter and keeping your content focused and engaging.
A Step-by-Step Guide to Creating Hanging Indents in Google Slides
There are three effective ways to add hanging indents in Google Slides. Once you've formatted your text, you can also use Smallppt's templates to give your slides a polished, professional look.
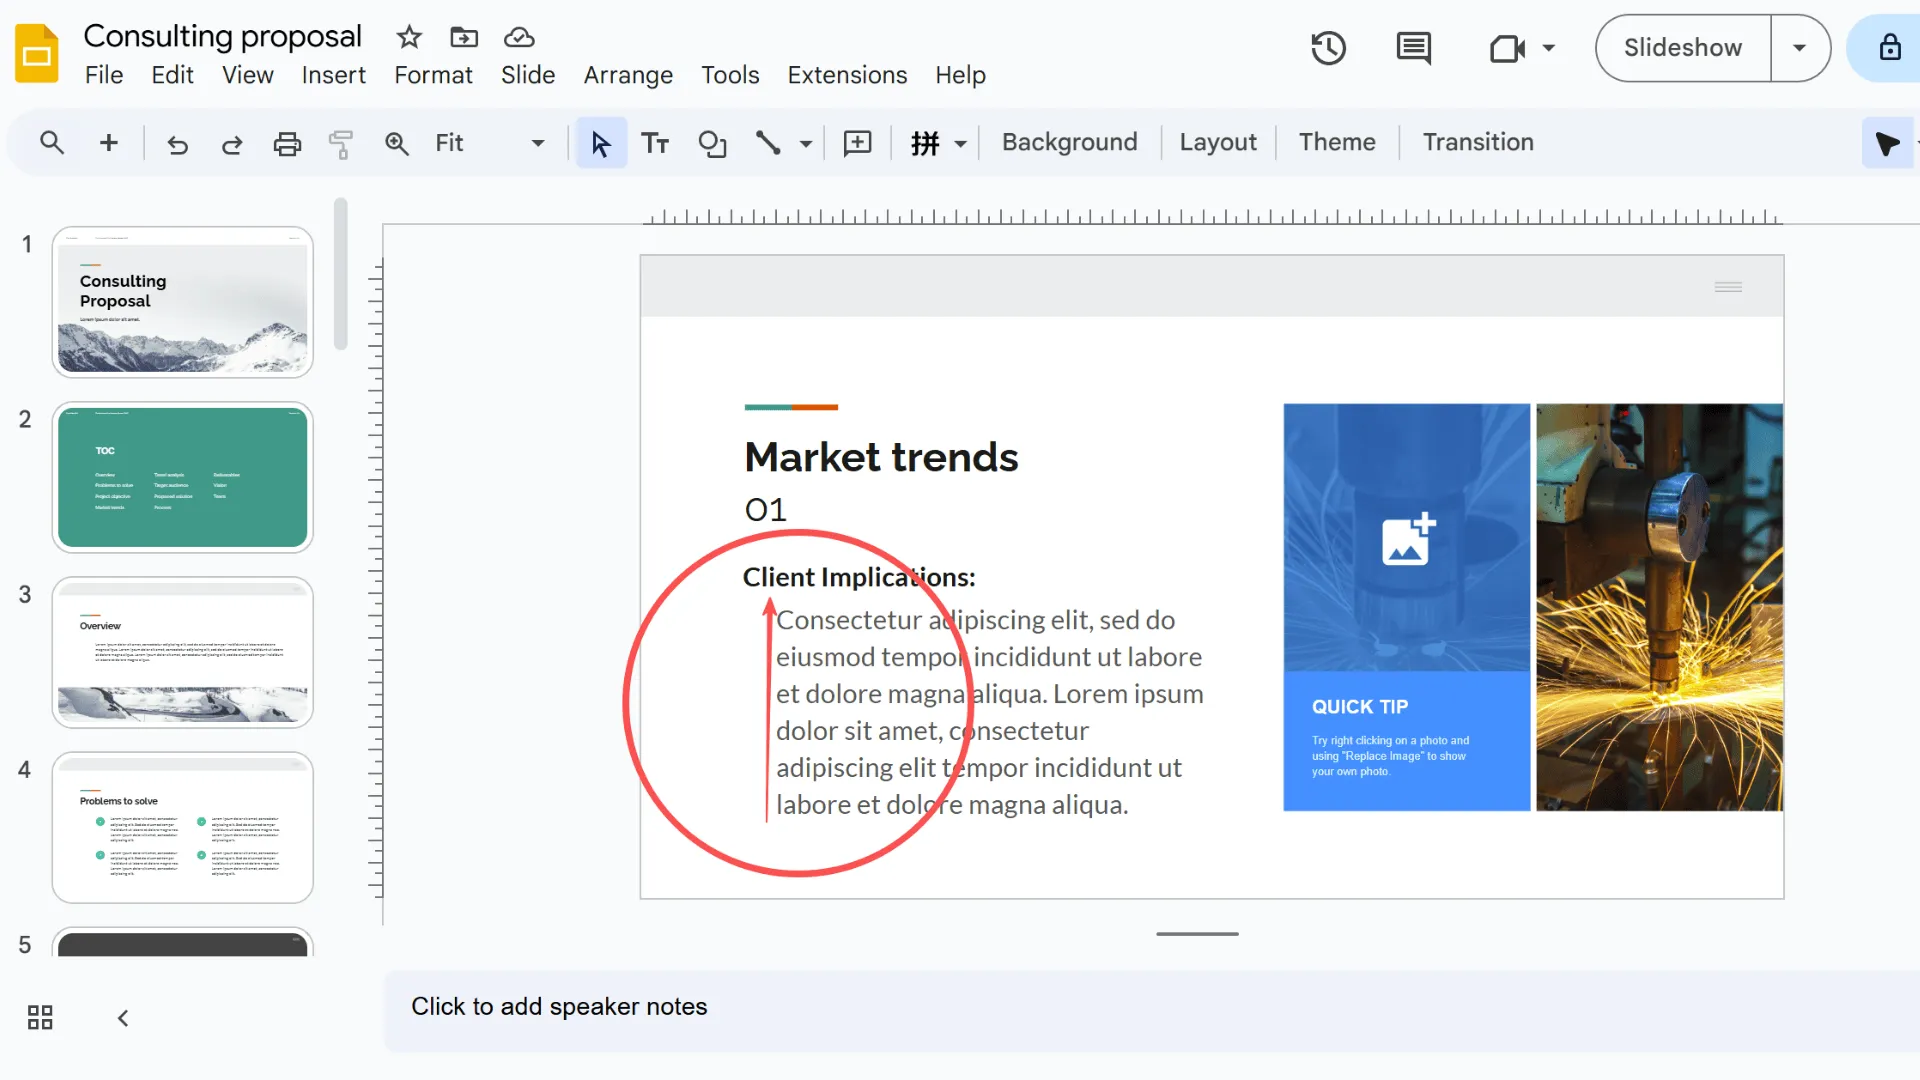
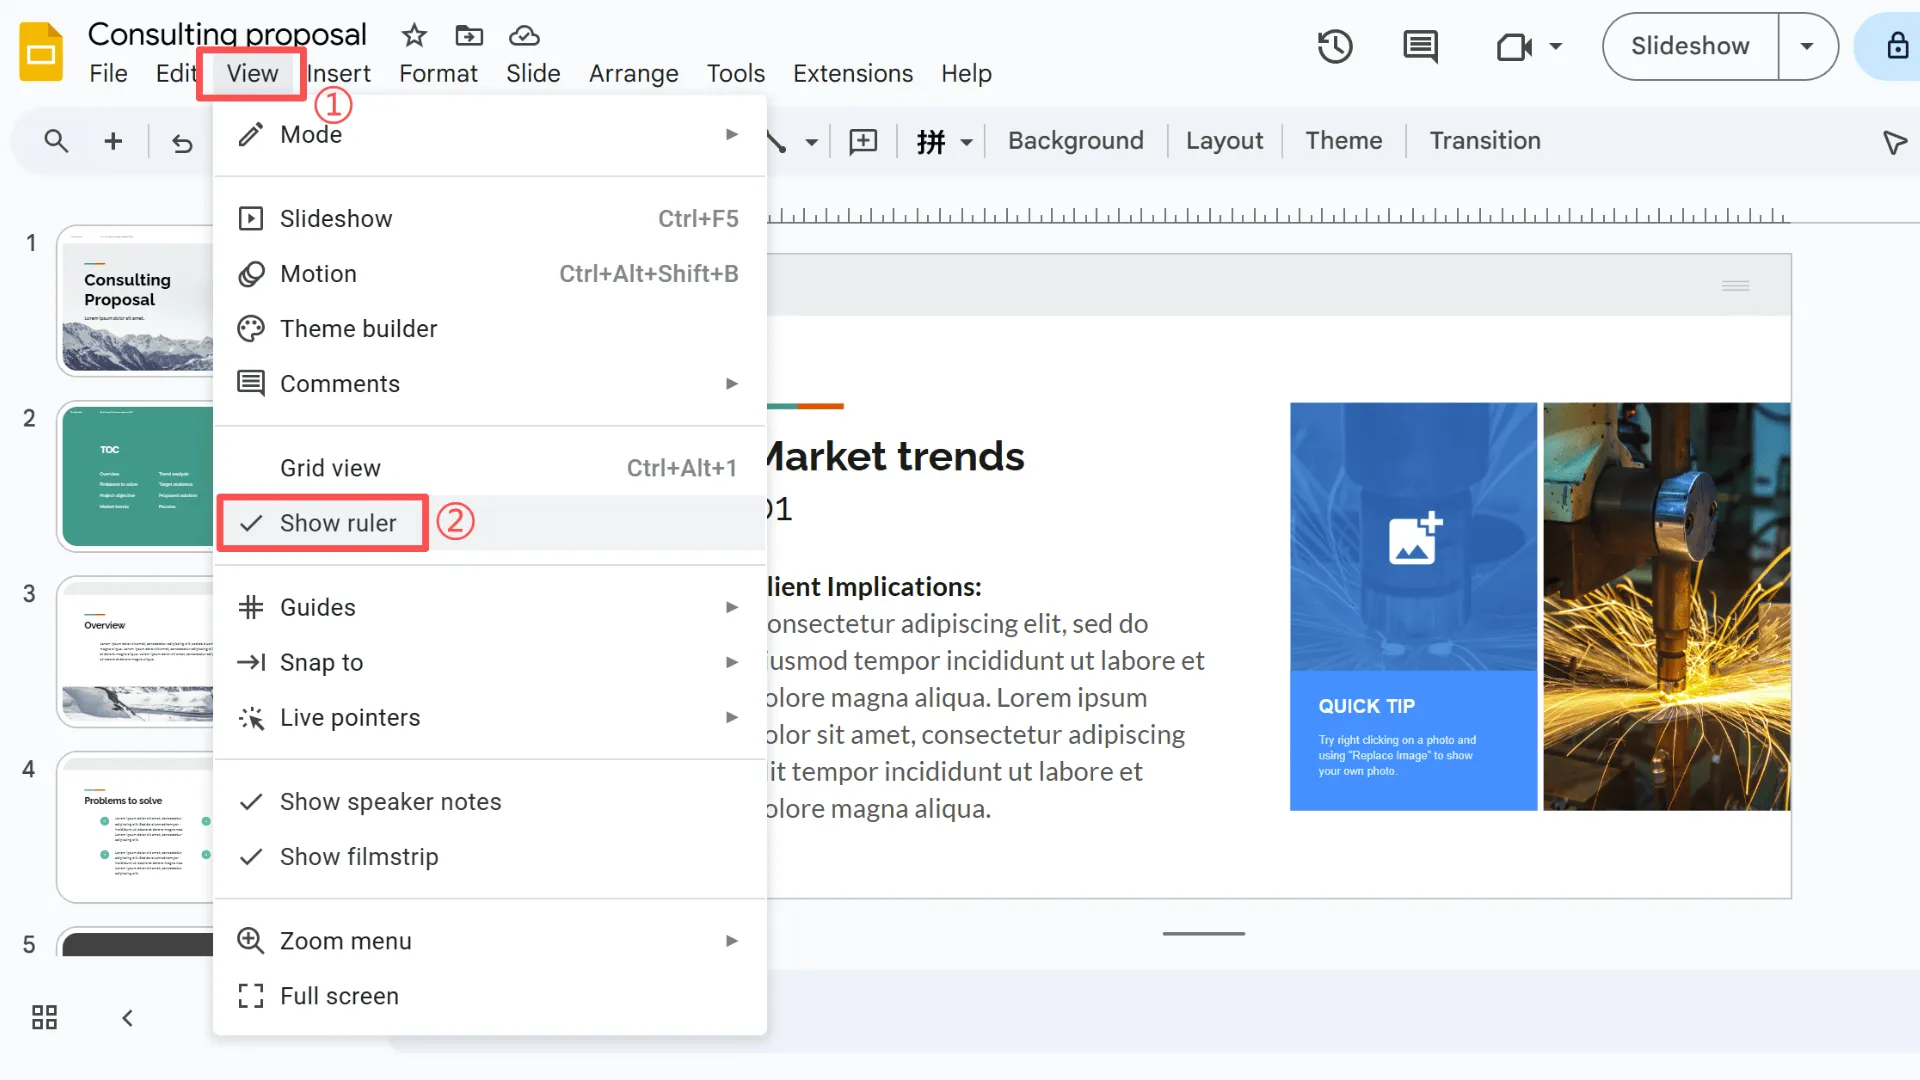
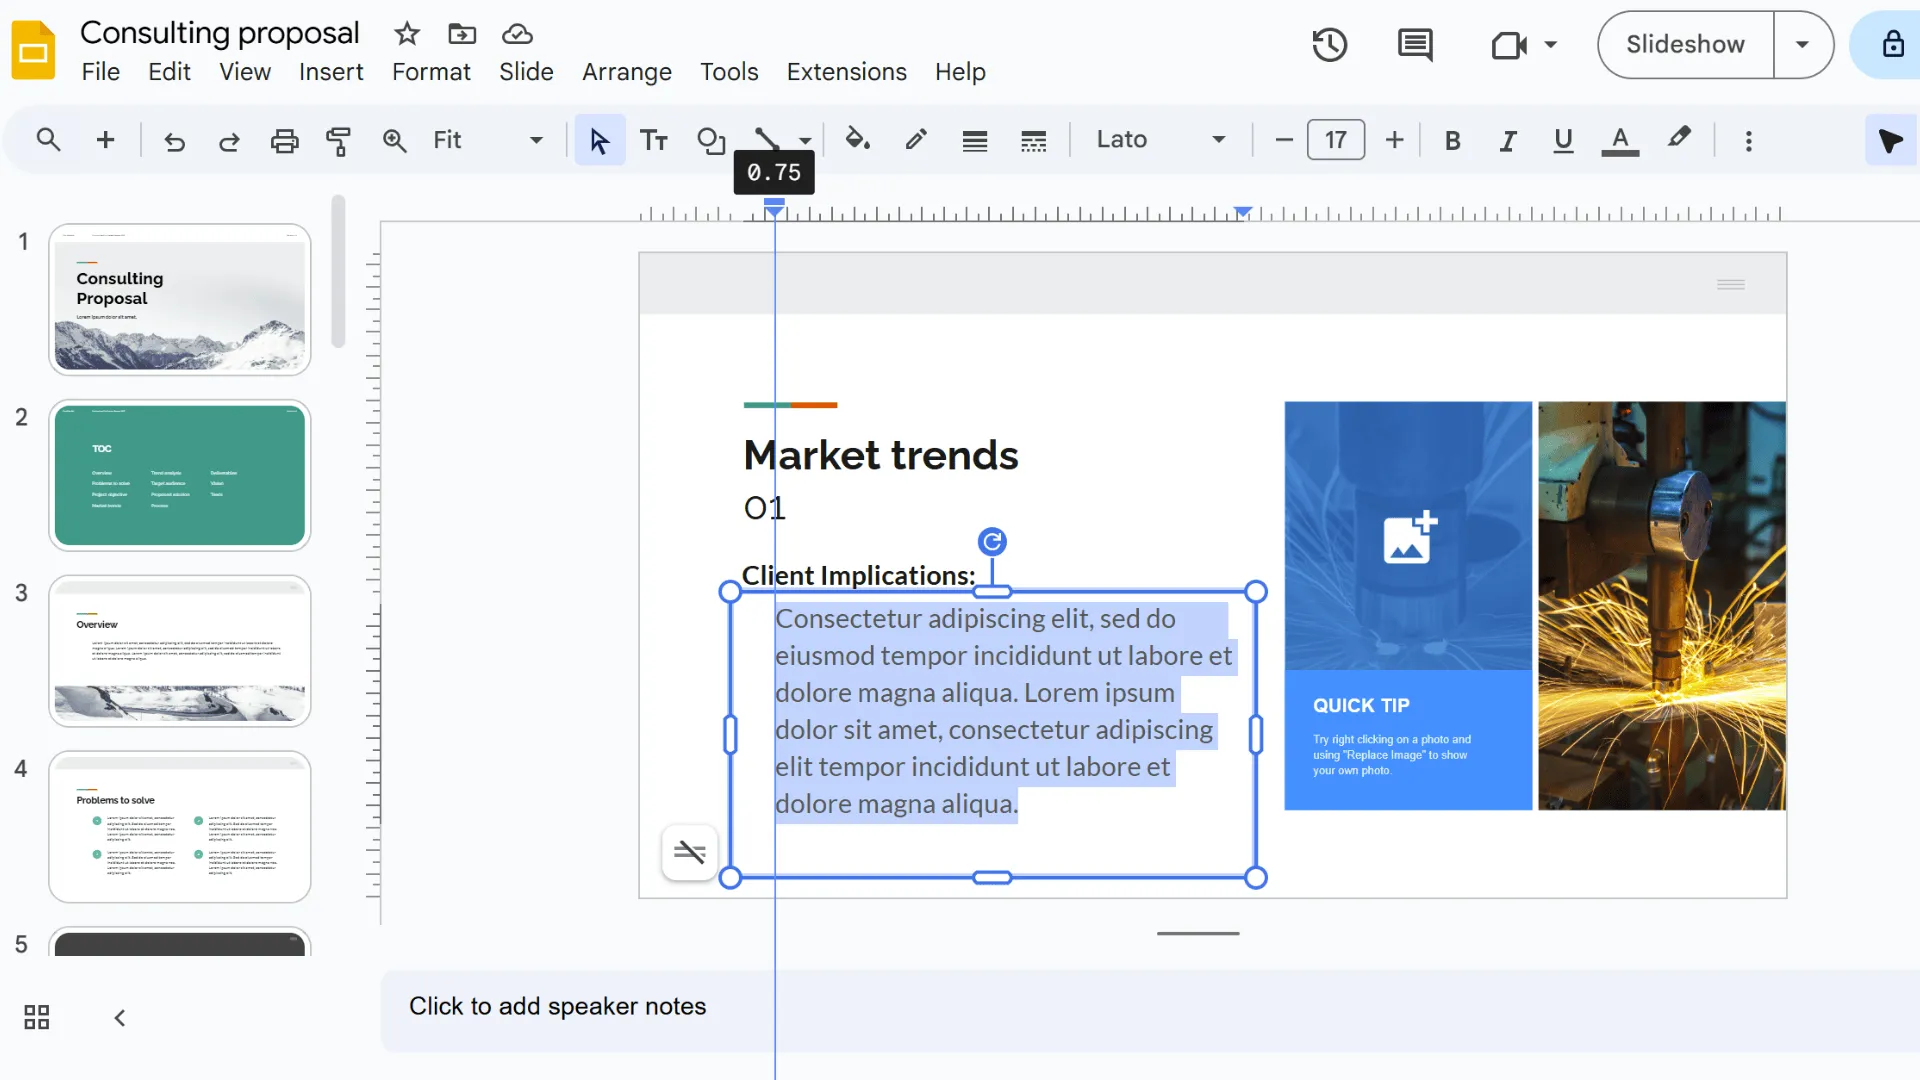
Method 1: Using the Ruler
1. If the ruler is hidden, turn it on first.
2. Adjust the left indent and first-line indent markers to create a hanging indent.
Tips:
- Fine-tune the spacing for precise alignment
- Works well for slides with multiple paragraphs
- Ideal if you want visual, precise control over your layout
Method 2: Using Keyboard Shortcuts
1. Select the line or paragraph you want to indent.
2. Steps:
- Press Shift + Enter (Mac: Shift + Return) at the end of the first line
- Press the Tab key to indent the following lines
Advantages:
- Quick and efficient
- Perfect for users who prefer working with the keyboard
Tip: Best for short paragraphs or when you need to create multiple hanging indents quickly
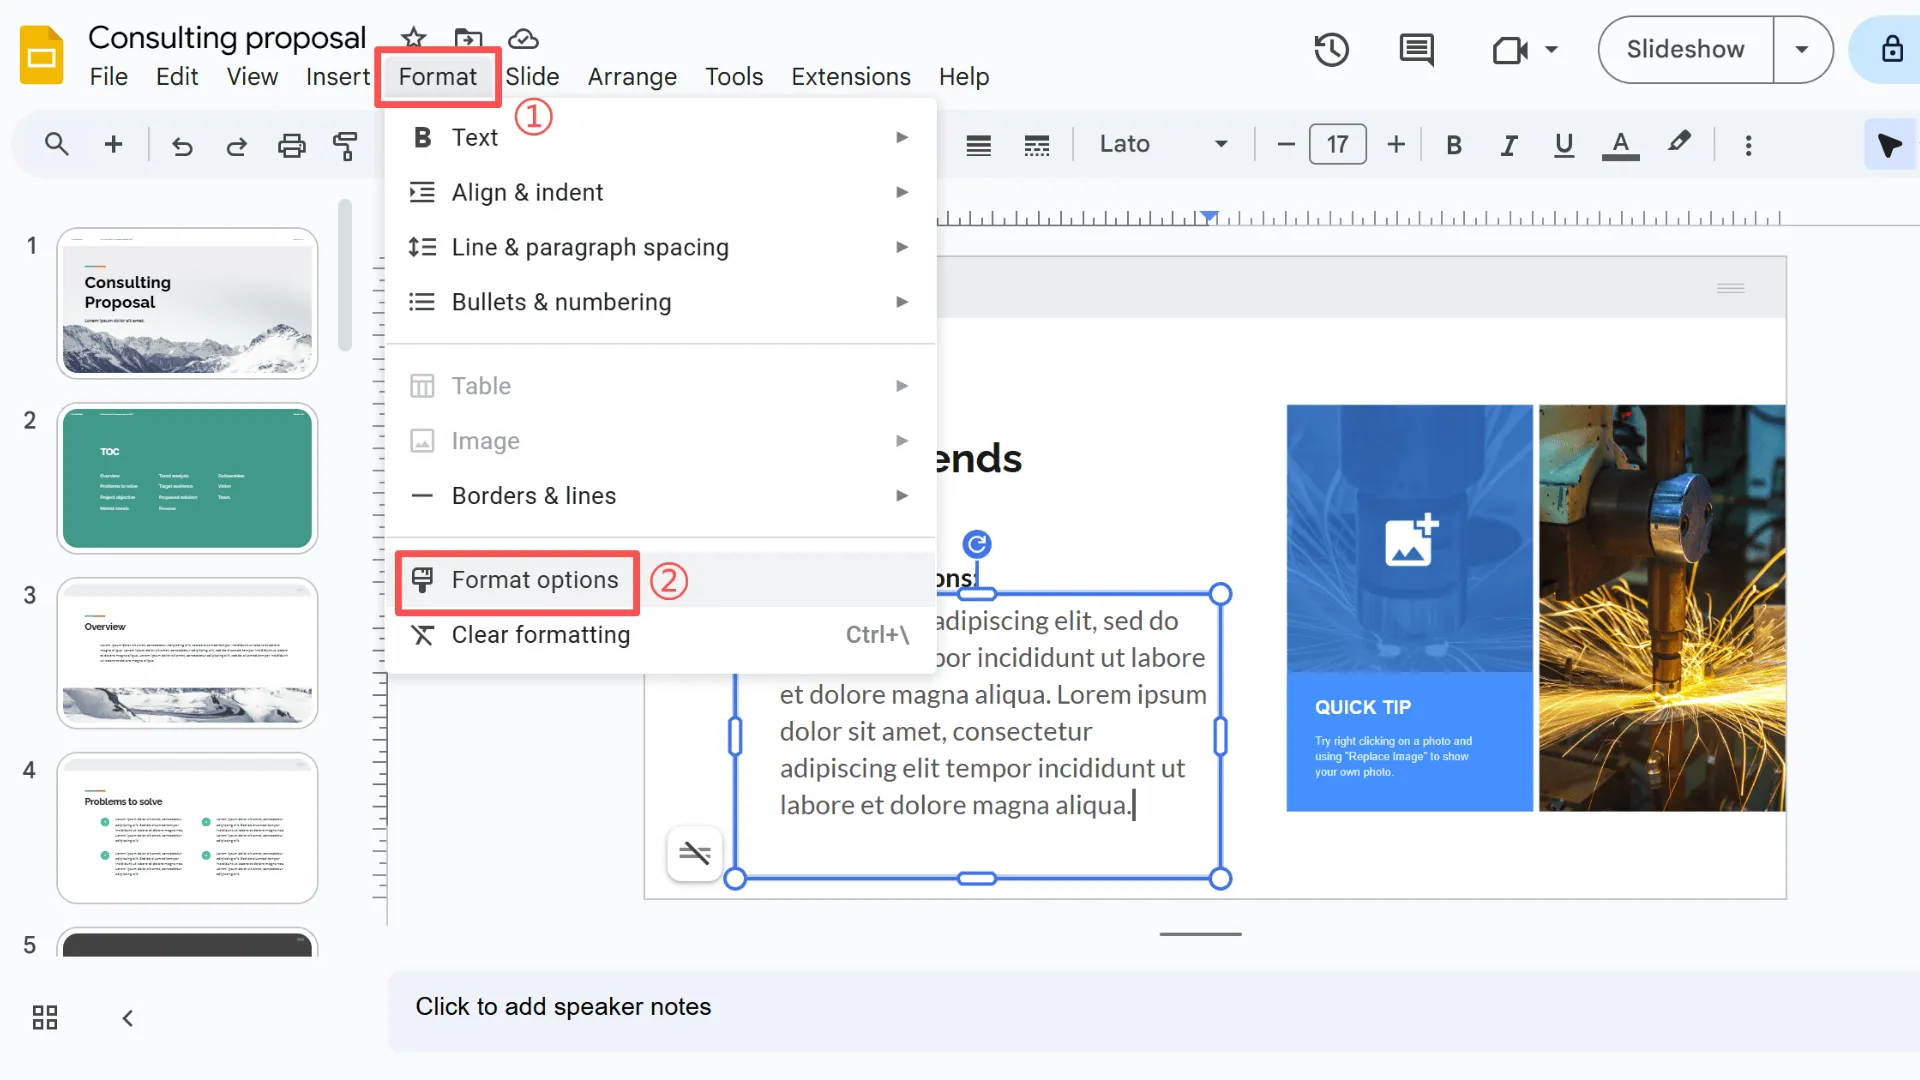
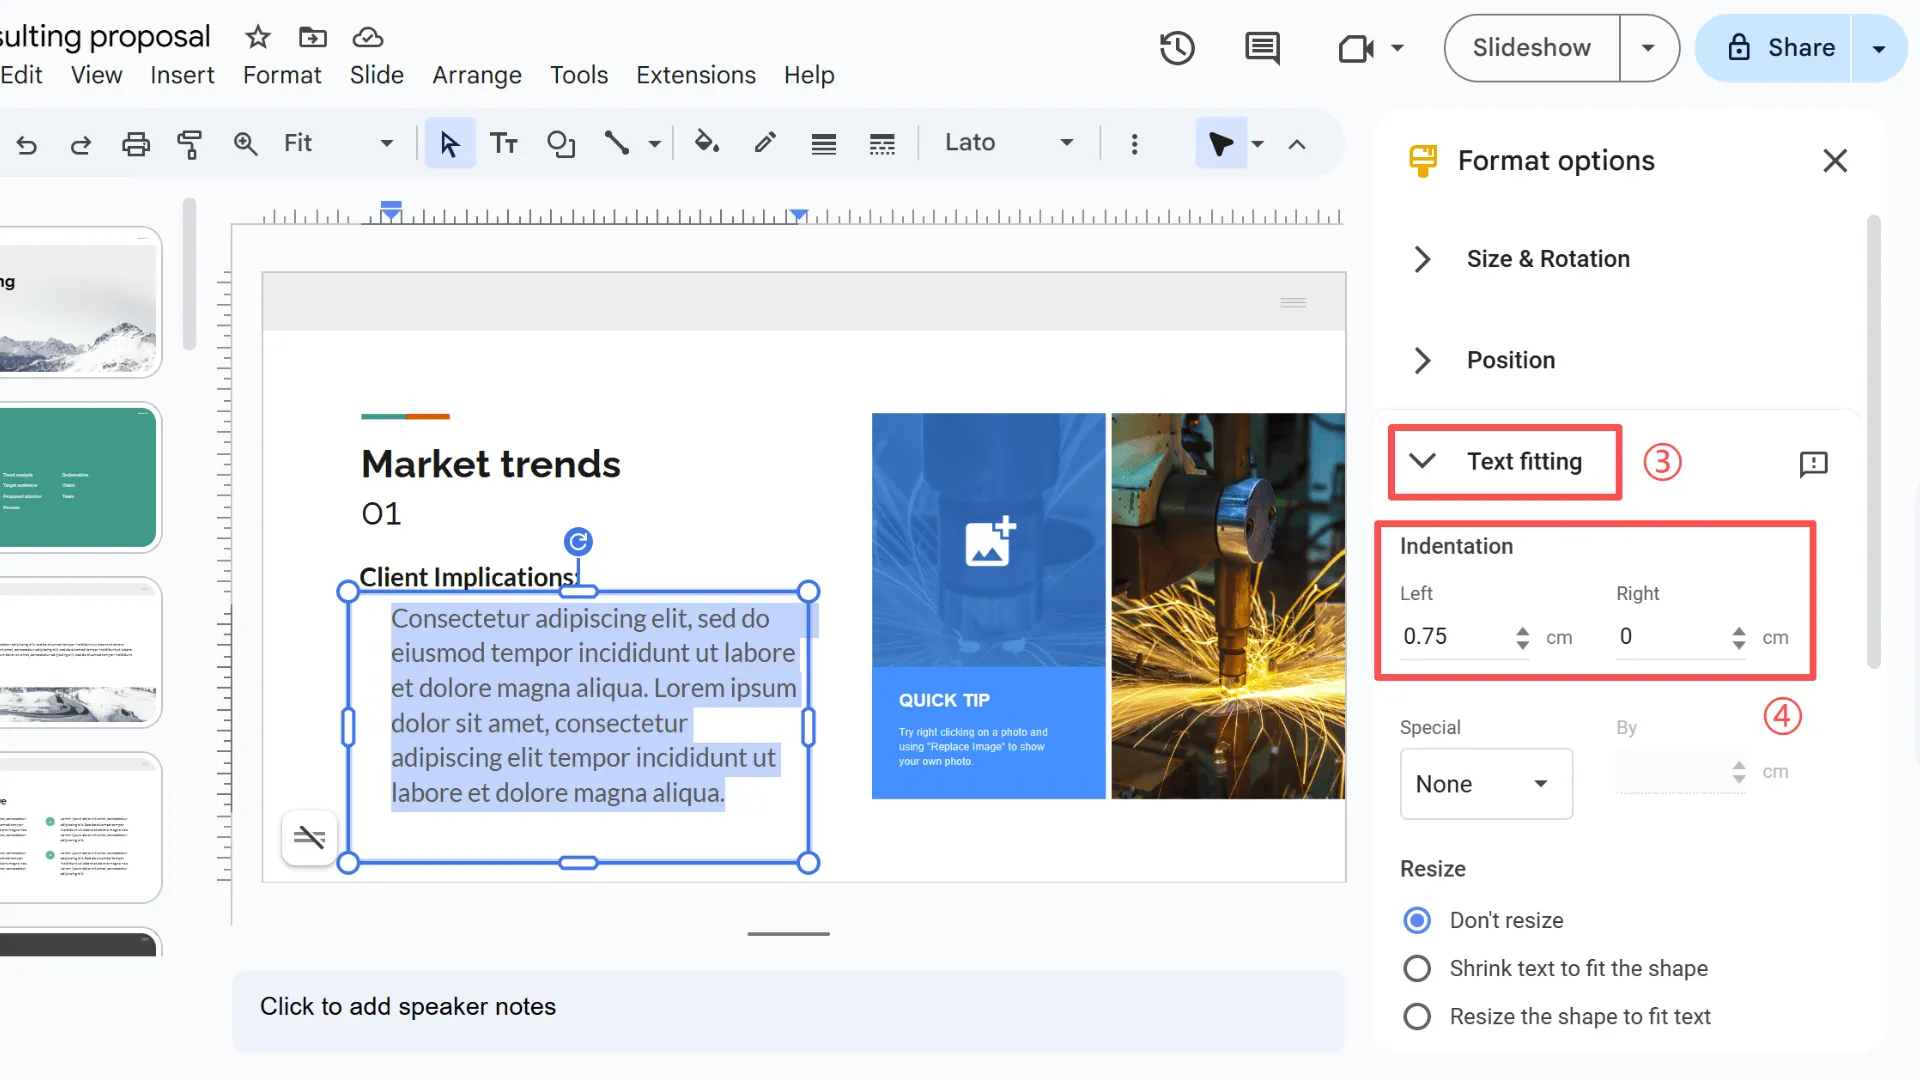
Method 3: Using “Format Options”
1. Go to: Format → Format Options → Text Fitting → Hanging Indent
2. Adjust the indent size incrementally for precise formatting
Advantages:
- Can apply to multiple text boxes at once
- Easy to modify if your layout changes
Tip: Works best for professional templates or slides that need consistent formatting
Wrapping Up: Choosing the Best Method
Here's a quick comparison of the three methods:
- Ruler: Intuitive and precise, great if you want visual control, especially for slides with multiple paragraphs.
- Keyboard shortcuts: Fast and convenient, perfect for those who prefer using the keyboard or need to create multiple hanging indents quickly.
- Format options: Flexible and allows for batch adjustments, ideal for professional templates or slides that require consistent formatting.
I recommend trying out each method and combining Google Slides formatting with Smallppt templates to get the best results. Using Google Slides hanging indent not only makes your slides look more professional and your text easier to read, but it also keeps your formatting consistent, leaving your presentation tidy, organized, and polished.
FAQs: Everything You Need to Know About Hanging Indents
Q1: What is the standard indent size for hanging indents in Google Slides?
The standard hanging indent is usually 0.5 inches, but feel free to tweak it depending on your slide layout and font size.
Q2: Can I use Google Slides hanging indent in bullet points?
Yes! Hanging indents work great for bulleted lists, helping your text line up neatly and making it easier to read.
Q3: Will hanging indents be preserved when exporting slides to other formats?
Most of the time, yes. But it's a good idea to double-check the layout when exporting to formats like PDF or certain PPTX versions, just to be safe.
Q4: How can I remove an applied hanging indent in Google Slides?
Simply move the indent markers on the ruler back to their default positions, or set the hanging indent value to 0 in Format Options.
Q5: What if a hanging indent doesn't align properly on my slide?
Try fine-tuning the ruler or adjusting the indent values so the first line and subsequent lines line up correctly. Also, check if your text box has extra margins that might affect alignment.
Q6: Can I apply hanging indents to multiple text boxes or slides at once?
Yes! Using Format Options, you can adjust multiple text boxes at the same time—perfect for batch formatting or keeping your entire presentation consistent.
Q7: Can I use Google Slides' hanging indents with Smallppt templates?
Absolutely! Combining hanging indents with Smallppt templates makes your slides look polished and professional, while keeping your layout neat and organized.

