


Do you know why you should use sections in presentations? Because they not only make it easier to organize and rearrange slides, but also help you find specific slides faster—and you can even assign sections to your collaborators.
Unfortunately, Google Slides doesn't offer an official “sections” feature. So this blog post will introduce multiple workarounds to simulate sections in your presentations.
How to Organize Your Google Slides Using Sections
Many people don't realize that using sections in presentations can help your audience understand when you're moving to different parts of the presentation, while also helping you maintain consistency in your presentation's theme. Below, we'll detail four methods:
Add Section Divider Slides
First, using section break slides is a highly practical method. These slides can contain simple content like the name or title of the next section, or you can introduce the upcoming section by adding images or other visual elements. Here's how to do it:
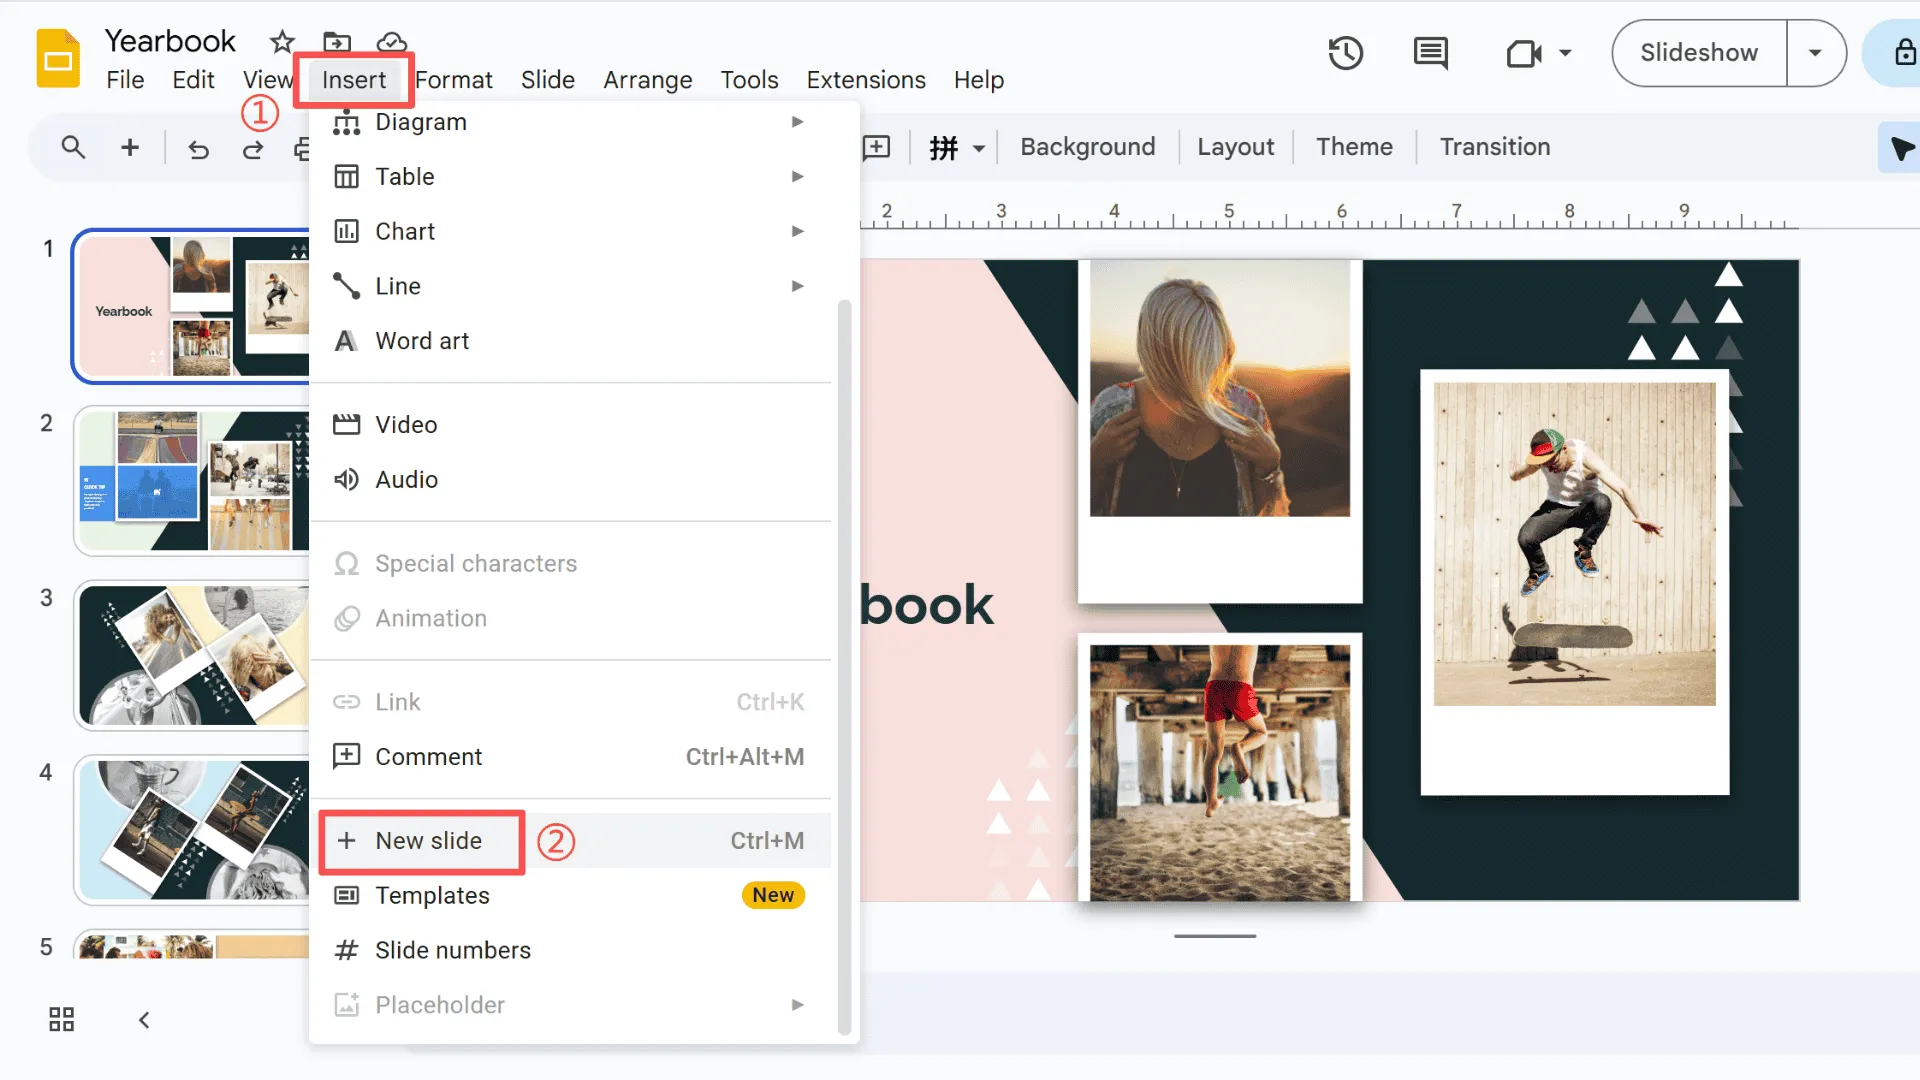
1. To insert a section break slide, choose one of the following three methods:
- Go to Insert > New slide.
- Go to Slide > New slide.
- Right-click the last slide of the previous section and select New Slide.
2. Open the Slide menu on the operation page, navigate to Apply layout, then select either the Section header or Section title and description layout.
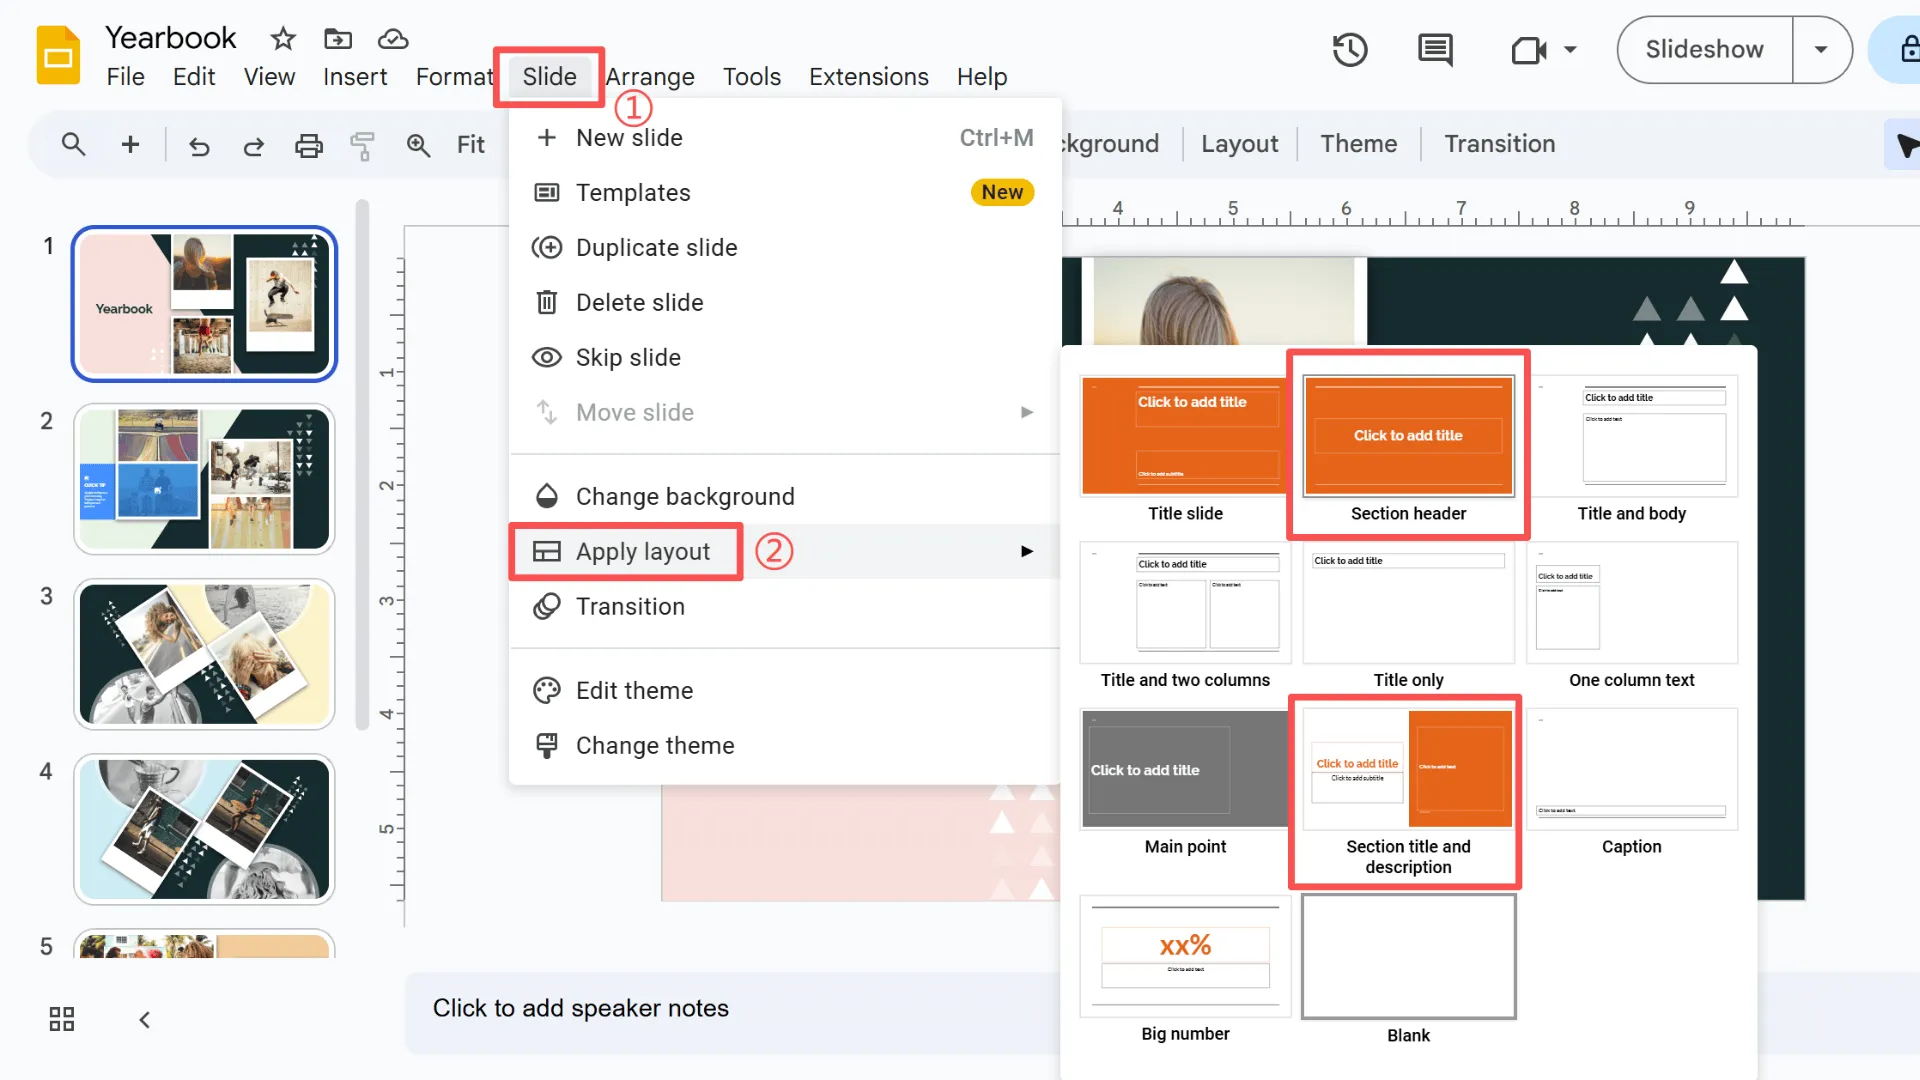
3. Click inside the text box to enter the title, heading, or other descriptions.
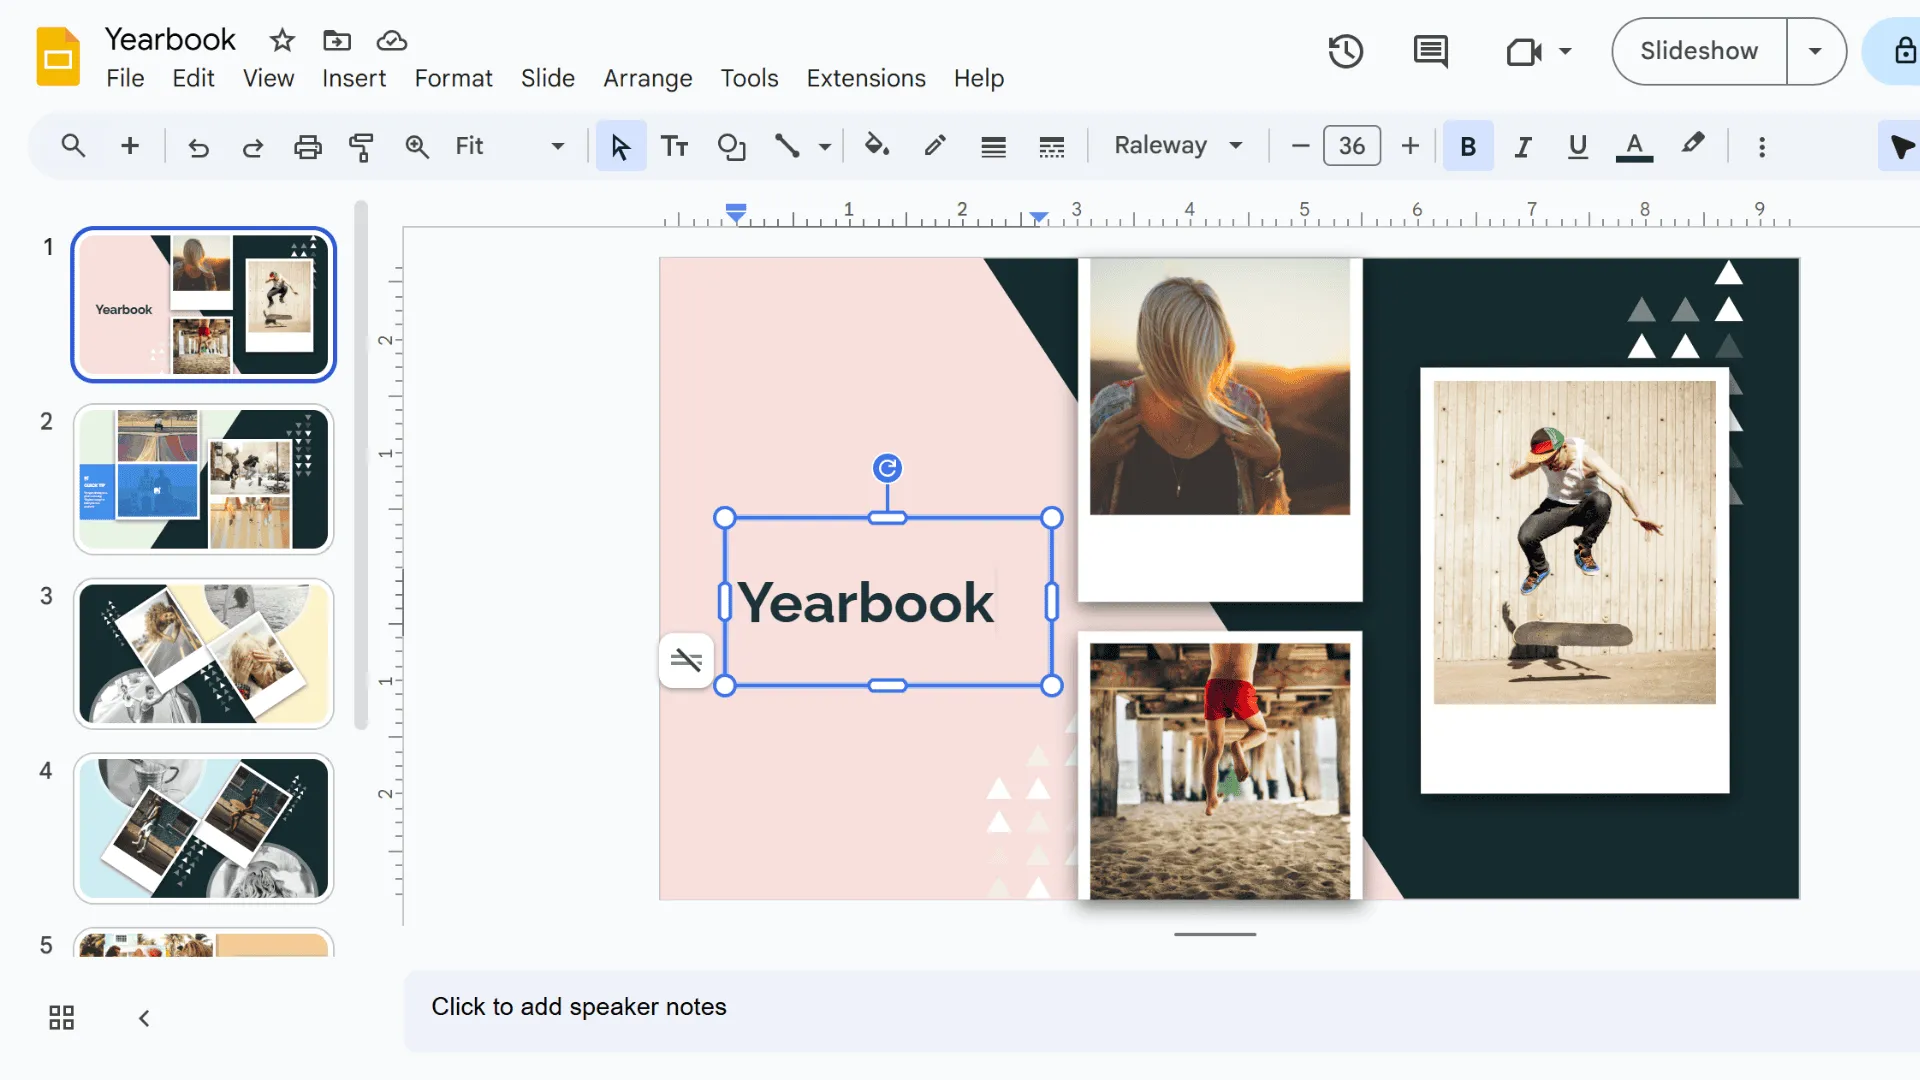
Finally, you can add additional formatting or slide elements as needed.
Use Prefixes with Section Names
The second method involves adding labels and numbering to slides to indicate each section.
For example, you can label the first section as number 1, and its subheadings as 1.1, 1.2, 1.3, and so on. Then, number the second section as 2, and its subheadings as 2.1, 2.2, 2.3, and so on. Subsequent sections follow this pattern.
This approach allows both you and your audience to see which section is currently being presented. Audience members can follow along with the presenter using the section numbers, while the presenter can maintain a natural pace and flow throughout the presentation.
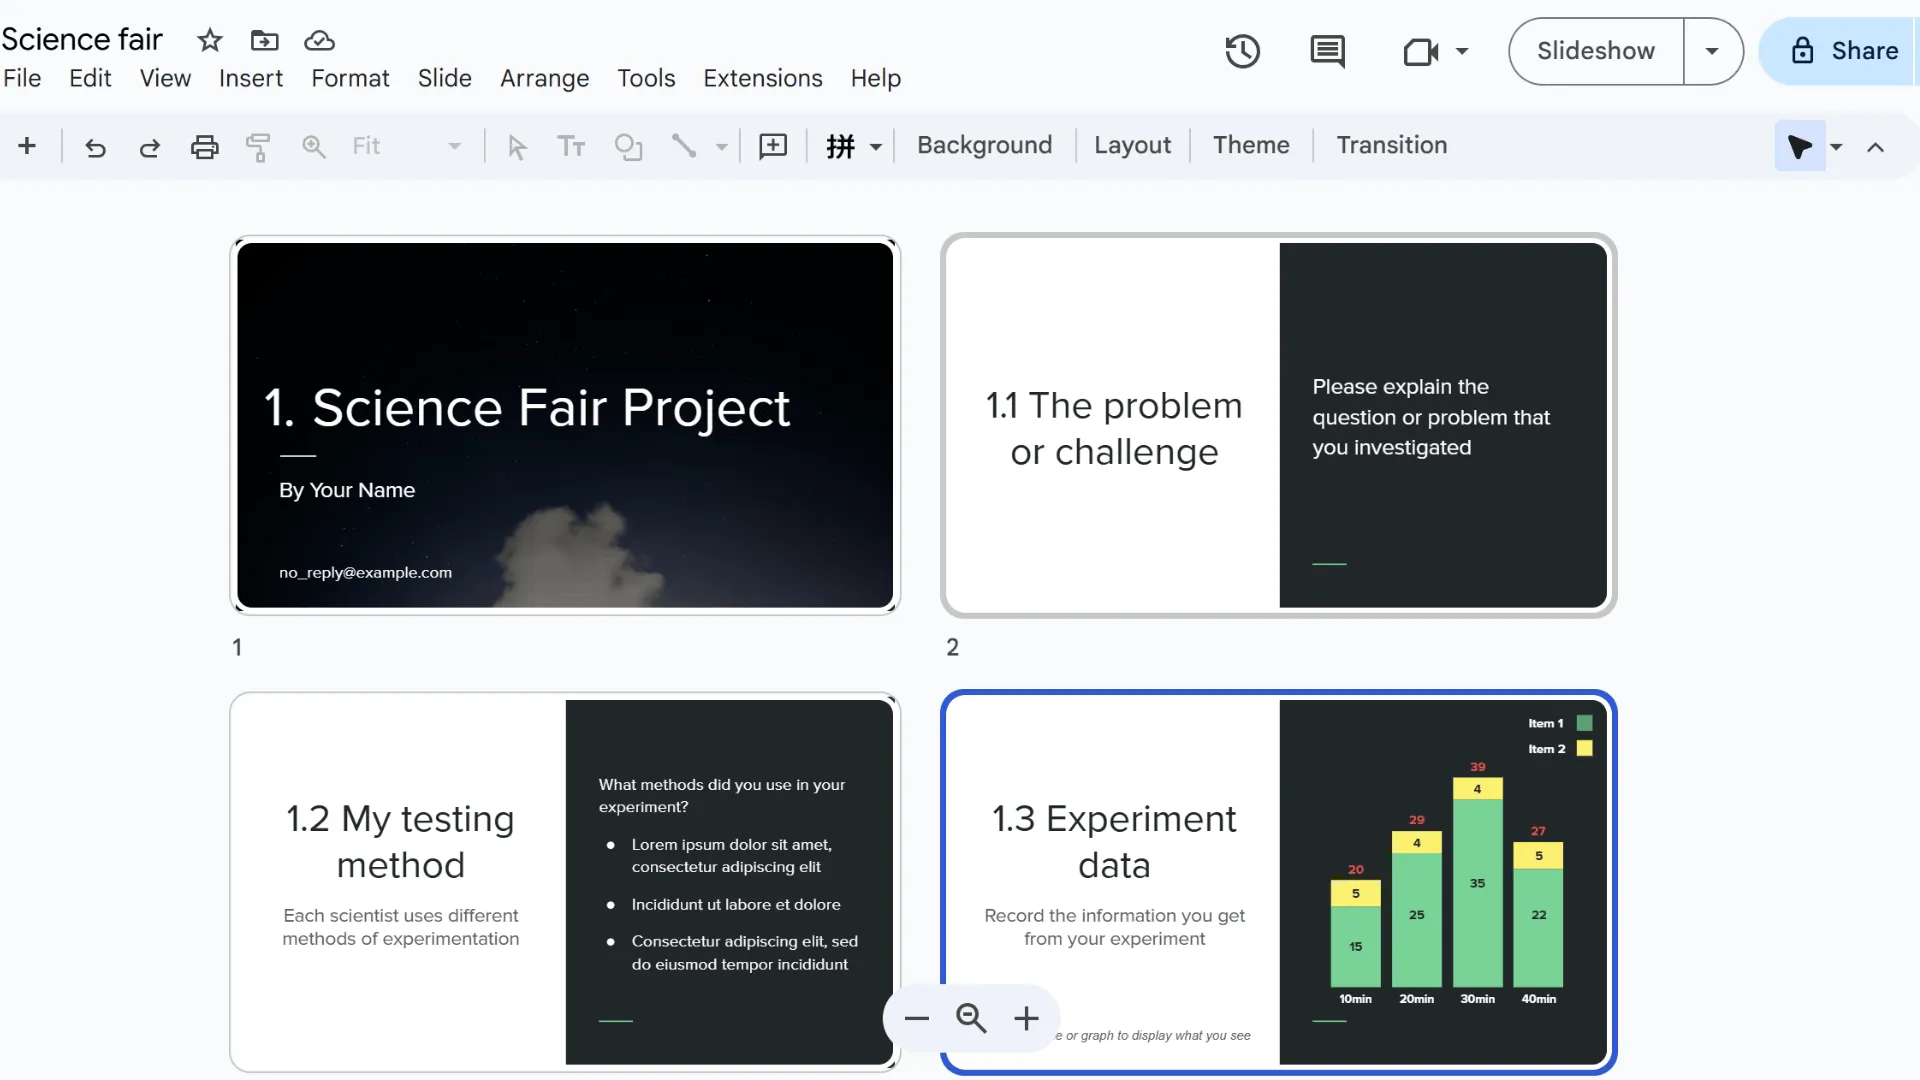
Apply Color-coding
In Google Slides presentations, another method for designating sections involves using color. You can change the background color of slides or adjust the color scheme of slide elements.
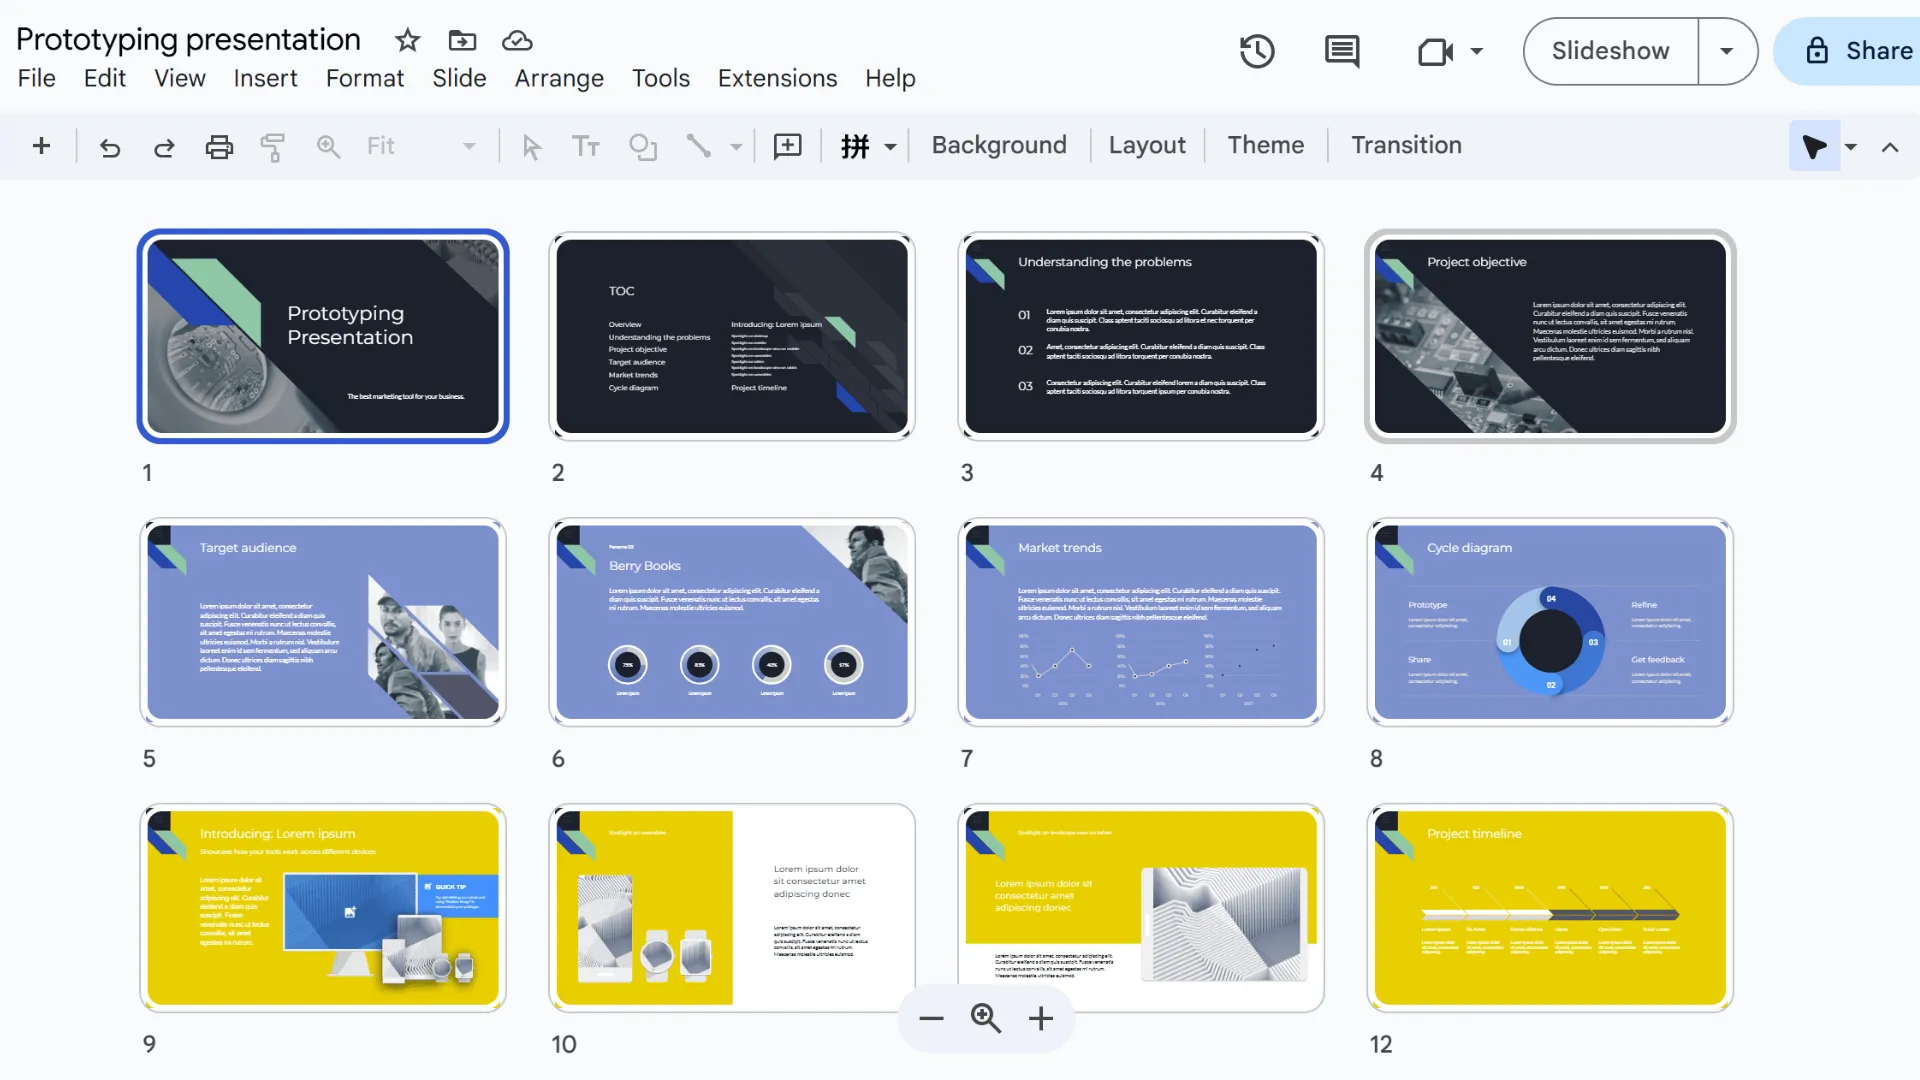
For example, as shown in the image below, we have four sections distinguished by different background colors.
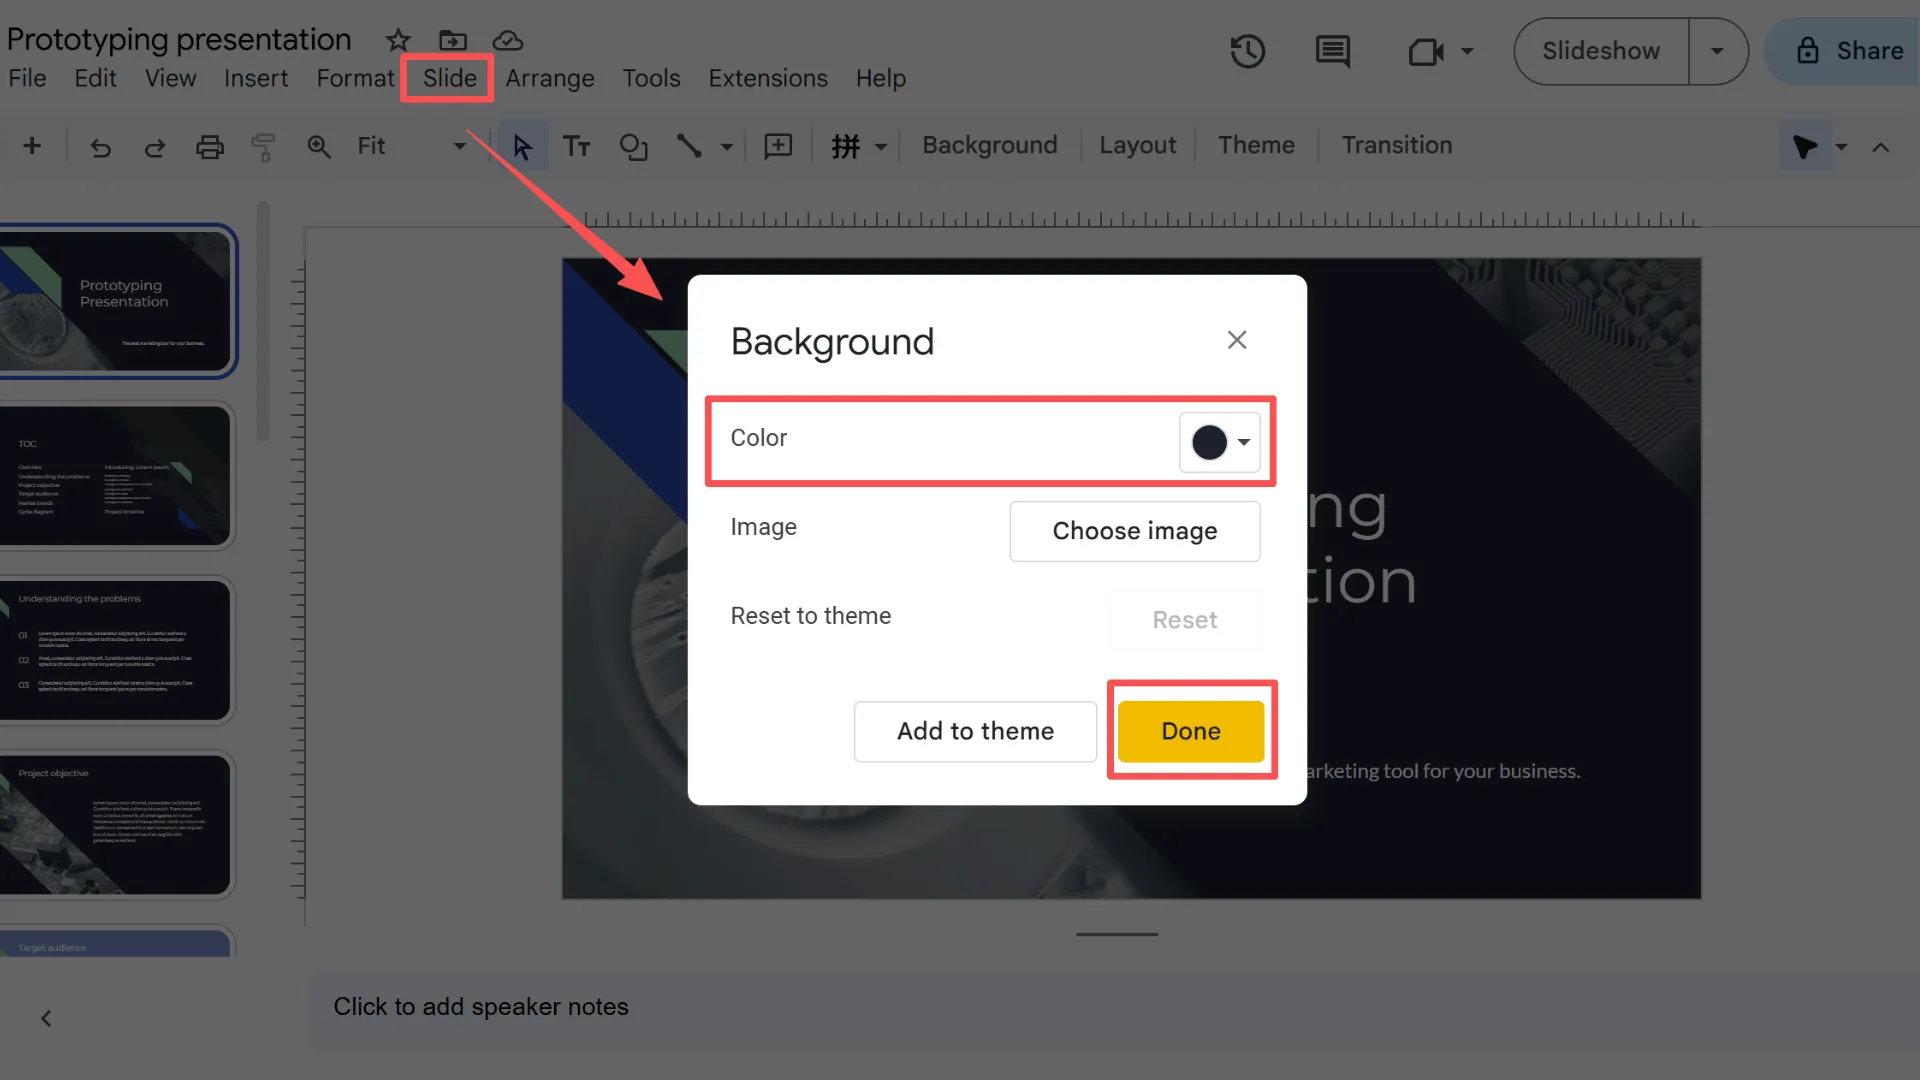
So, how do you add background colors to slides?
1. First, select the slide you want to modify.
2. Then select Background from the toolbar.
3. Click Color and choose your desired shade from the dropdown menu.
4. Remember to click Done after selecting to save the changes.
5. Repeat these steps for all other slides within the same section.
Note: The process for adding color to slides in different sections is identical, but each section requires a distinct background color.
Automatically Create Structured Sections with Smallppt
If you find the above methods too cumbersome and prefer not to do it manually, here's the simplest approach: use Smallppt. Smallppt automatically divides your presentation into clear chapters based on your input, making the slide structure more organized.
- Chapter Cover Slides: A chapter title page is generated for each main heading or major section.
- Content Slides: Detailed content under each chapter is automatically split into separate slides.
- Logical Grouping: In the left navigation panel, each chapter appears as an independent group, making it easy to view, adjust, or reorder slides.
Usage Steps:
1. Open the Smallppt official website and select the AI Slides module.
2. You can choose to paste text, upload files, or import a web link.
3. Set parameters such as the number of slides, audience type, and tone.
4. Click Generate. Smallppt will automatically create sectioned slides within seconds.
5. Select a suitable template matching your style or brand identity, then click Generate.
6. After generation, modify section titles or reorder slides in the left navigation panel to further refine the structure.
Thus, Smallppt enables you to create presentations with a clear structure and logical flow, saving significant manual grouping time while ensuring audiences grasp content progression effortlessly.
Visit the Smallppt website now for a free trial!
Conclusion: Improve Your Presentation Flow with Sections
The section feature allows you to efficiently organize, rearrange, and locate slides. This not only enables a smooth presentation flow but also helps your audience better grasp the content structure and follow your train of thought, thereby enhancing the overall viewing experience and information retention.
That concludes the main points of this blog. You can try all four methods mentioned. Of course, using Smallppt directly is the most convenient option—it gets the job done in one step!
FAQs: Using Sections in Google Slides
Q1: Why should I use sections in my presentation slides?
Using sections in presentations makes it easier to organize and rearrange slides while helping your audience follow your train of thought more smoothly.
Q2: Why can’t I group elements in Google Slides?
You can only group elements like images and shapes, or items on the same slide.
Q3: What is the easiest way to add and manage sections in presentations?
Use Smallppt to generate professional slides directly—from dividing sections to the final slide product, no manual work required.
Q4: Is Smallppt free to use?
Yes, Smallppt offers a free trial that lets you explore its features. If you need more advanced tools, you can upgrade to the Pro version for additional capabilities.

